------Home---- ----About Me---- ----Lots Of Links---- ----Recipes---- ----Reviews---- ----Resources---- ----My Photo Blog---- ----Contact Me----

Showing posts with label Natural Living. Show all posts

Thursday, November 14, 2013

Soaps By Deni - Review


I just want to take a moment to recommend some great natural soaps and other products.  :-)

Because of having sensitive skin and being health conscious, I've used a variety of natural soaps and body products over the years.  When I started having children, I knew that I couldn't put anything but pure and natural products on their skin, and Johnson & Johnson or Aveeno "natural" lines just weren't good enough for me.  I also have a daughter who struggled for several years with eczema and psoriasis.  Enter "Soaps by Deni".  :-)  About a year ago, a friend, Denine, started making natural goat milk and oatmeal soaps, and our whole family loves them!  Her soaps are pure and natural and are wonderful for those with allergies, ezcema, psoriasis, or anyone who loves to use natural products.  They lather well, smell amazing, and most importantly, are very gentle on the skin.  The "Soaps by Deni" product line has now expanded to include body wash, lotion, body scrubs, bath salts, and linen & room sprays.

There is a great Pre-Holiday Sale going on right now, along with some new holiday fragrances, so head over to the Facebook page (https://www.facebook.com/SoapsbyDeni) and check it out!


Thursday, October 6, 2011

How to get rid of fire ants naturally


I wanted to know the cheapest natural way to kill fire ants, because we have A LOT of them in our yard.  And I didn't just want to destroy the anthill and have them build another one somewhere else...I wanted to kill them so they would never build again!  So I did a little research, and guess what I figured is the cheapest fire ant killer?

Water.
Yep.  Boiling water.
How great is that?

I spent a good portion of one morning boiling big pots of water and dumping them on ant hills in our yard.  I made sure to soak them good, even if it took two or more pots full of water.  That was several days ago, but look at what is in the place of all of those anthills...


Piles of dead fire ants.  It works!

Wednesday, September 21, 2011

Tuesday, August 9, 2011

Fruity Yogurt Sundae

This is one treat you can eat without feeling guilty!  The Fruity Yogurt Sundae is yummy and healthy.  It makes a great breakfast, snack, or dessert.  I just finished eating this for lunch today!  :-)


Fruity Yogurt Sundae
Plain Yogurt
Granola
Fruit {I used Peaches here, but I've also used blueberries and bananas before, so do whatever you like!}
A drizzle of honey {optional - I do this once in a while for an extra special treat}

Grab a bowl and put all of the ingredients in one at a time.

Yes, it's that easy!  :-)

Enjoy!

Tuesday, July 19, 2011

Homemade Larabars


These snack bars are simply AMAZING!  Seriously, this is my new favorite food.  :-)  They are on the pricey side to make, but they are raw and full of nutrition!  I wish I knew what the protein amount is for one of these bars.

Homemade Larabars
2 cups almonds
1/4 cup flax seeds, chia seeds (I have used flax and chia, but flax is my favorite)
1/2 cup dried prunes, dates or raisins (I used prunes)
½ cup unsweetened shredded coconut
½ cup peanut butter
½ cup coconut oil (melted)
1-2 Tbsp maple syrup or honey (I used honey)
2-3 teaspoons vanilla extract

Chop almonds, flax seeds, and shredded coconut in a food processor until finely chopped.  Pour into a mixing bowl.

Chop prunes in the food processor.  Add to mixing bowl.

Add remaining ingredients and mix well.

Put the mixture in a glass 8x8 pan and press down.

Place in refrigerator until chilled.  Once chilled the bars stick together more (they won't be crumbly).

Cut into bars.  Store in the refrigerator.  These bars can also be frozen.

Enjoy!

*this recipe is modified from this Nourishing Protein Bar recipe

Thursday, July 7, 2011

How to Dry Oregano

Oregano is an easy herb to grow, and it is so simple and frugal to make it into your own dried oregano spice!

Here's what you do:

1. Clip off a lot of oregano stems leaving a few inches still on the plant.  The plant will continue to produce more and more!

2. Wash the oregano, then lay on a towel to dry.  It will take a few days to dry out all the way.

3. Hold the oregano stem between your thumb and finger, then run them down the stem from one end to the other, pulling the leaves off.  The leaves should fall right off when the oregano is completely dry.  Repeat with remaining stems.

4.  Put the leaves in a bottle or ziploc bag for airtight storage.  If you want you can crush the leaves into smaller pieces more like the oregano that you would buy in the store.

That's it, you're done!  :-)

Friday, June 10, 2011

Why I choose natural birth

Birth and babies are two things very close to my heart.

I think partly because I grew up knowing my parents believed in natural birth, I sort of always knew I wanted that.  My mom had eight babies naturally (6 of them at home) and that made a big impact on me.  It inspired me, and it gave me the confidence that I could do it too.  I am so thankful for the atypical perspective this gave me. 

The more I think about it, the more I realize that what we do really does affect our children and the choices they make as they grow up.  I don't want my daughters to be scared of birth, to think it is an illness, or to think that doctors always know better than they do.  I want them to know that God created their bodies to give birth to babies.  Most of the time interventions to this natural process of growing and birthing babies are unnecessary, and often they are detrimental to mom and/or baby.

The key to a successful natural birth is having someone who cares {personally} about you and having someone who you can trust.  A good support system is crucial.  A good midwife or doctor believes in you even when you don't.  When you're in the midst of pain that is clouding your judgement and you don't think you can do it anymore, a good care provider calmly encourages you and helps you to reach your goal of natural birth.  A doula is also a wonderful blessing.

Natural birth is best for baby.  God created the mother's body to release endorphins {in response to the pain} as she births her baby, which aids in the wonderful bonding of mom and baby.  {If you've birthed with drugs, you may be thinking that you bonded just fine, but having been on both sides with a completely natural vs. a not so natural birth, I can tell you there has been a big difference in the bonding levels.  It's like "fine bonding" vs. "wow bonding".}

It's amazing how beneficial it is for the baby to travel through the birth canal.  As the baby squeezes through the canal, the squeezing expels the amniotic fluid from the baby's lungs in preparation for the baby's first breath.  Having a c-section doesn't accomplish this. 

Natural birth eliminates your baby being born with drugs in their system.  Drugs in you and your baby can cause discomfort, affect bonding, etc. for both the mom and baby.  The drugs do cross the placenta and can even affect the baby's respiration.  Of course pain meds and epidurals are common and popular.  No doubt it works to ease pain, but is it best?  Why do we think it is normal and ok to pump such a pure and tiny baby with drugs if not absolutely necessary?

Pain is not always bad.  We have been taught to fear pain.  And that fear causes more pain.  Vicious cycle, huh?  The knowledge of how God created my body to birth a baby, and the knowledge that the pain is accomplishing this, really helps me to push through the pain.  Even to be thankful for it.  Admittedly that isn't always what I'm thinking during birth {although sometimes I do}, but afterwards I can look back and be thankful for it.  Experiencing this "labor of love" is a beautiful thing.

Although I say that pain can be beautiful as it accomplishes it's purpose, I also believe that birth doesn't always have to be as painful as it is.  The birthing class that I took when I was pregnant with my first child was a huge help in learning how to manage and deal with pain.  Learning to relax has an amazing effect on the pain, as well as knowing that I am surrounded by an amazing, supportive birth team.  Looking back at all three of my births, I can see a difference in the pain I experienced as directly related to the fear/anxiety/calmness I was feeling while in labor.  The two births that were overall much more painful, I believe were more painful because I was scared, anxious, and not surrounded by people that I felt I could trust.  It's amazing.

Also worth noting, is the fact that most doctors are trained for complications, not for normal birth.  Midwives, are in general, the opposite.  OB doctors are more specifically trained in handling high risk, abnormal, emergency situations, rather than low risk, normal situations.  That being said, if I am able to have a normal, natural birth, I would much rather have a midwife, but, if I needed a surgery I would rather have a doctor skilled in that area be the one to perform it.

Of course, all of this is just my two cents.  You can take it or leave it.  I am not a physician of any sort, I only hope to share my experiences and the things that I have learned.  Although I would love to see all women desire and attempt natural birth, I also don't believe in pushing anyone to it.  It has to be your decision and what you are comfortable with.

There is so much more that could be said, but I don't want to make this so long that no one will want to read it!  If you have a specific question {within reason, of course}, leave a comment or email me and I will do my best to answer.  :-)

You can also check out my thoughts on breastfeeding here.

Wednesday, May 18, 2011

Boo Boo Rice Bag {Tutorial}


Learn how to make your own hot/cold rice pack also known as a rice therapy bag or boo boo rICE pack.  The rice bag is an easy DIY project and it is great to keep in the freezer for boo boos or it can also be warmed to use for heat therapy.  It only takes a few minutes and it's super simple!  :-)


Cut a rectangle or square piece of fabric.  I had a scrap lying around so I folded it and then marked where I wanted to cut.  I ended up with a 6x9 piece of fabric.

Next, fold the right sides together and stitch around the edges leaving a small opening so you can put the rice in.  I stitched about a 1/4 inch from the edge.


Turn right side out.

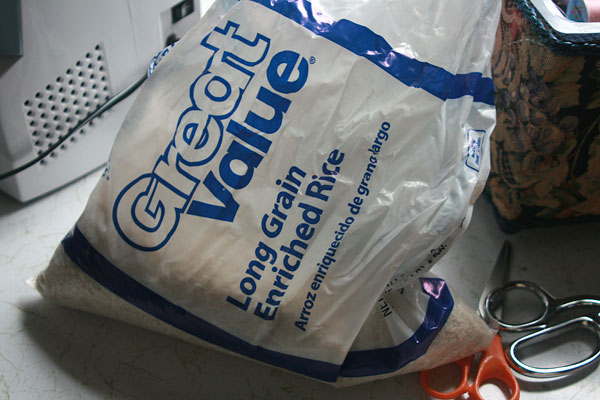
Make a funnel, stick it in the opening of your bag, and pour the rice in.  To make a funnel I just used a piece of paper.


Fill the bag about 3/4 full or until it seems good to you.  {For an extra calming effect add dried lavender and/or chamomile to your rice bag.}


Fold the edges of the opening to the inside and stitch the opening shut.  You can do this by hand using a slip stitch, or use the sewing machine.  If you want to add extra durability you can do a top stitch close to the edge.


Voila!  Now you have your own boo boo rice pack!


*Store in the freezer for use as an ice pack, or heat in the microwave to use for a heat pack.

Friday, March 18, 2011

Cloth diapers, here we come

This is the second week of cloth diapering with Micah, and we are loving it!  I have always wanted to do this, but was overwhelmed by the thought at first.  It just seemed like a lot more mess and time to have to deal with.  Plus it is a pretty big investment at first, although of course you do save a lot of money in the long run.

I did try cloth diapering for a short time with my twins, but they were already older and with all that I had going on at the time, I just didn't really get into it.  I hadn't purchased any cloth diapers since my sister had given me some of her prefolds to try, so I wasn't really out any investment wise.  But the thoughts lingered in my mind, that I should give it another shot.  Plus if they used to do it back in the day, surely it was doable, right? 

During my pregnancy with Micah a friend gave me a bunch of her old cloth prefold diapers and diaper covers, and I was determined to try again.  I'm so glad I did!  Contrary to what people tend to think, it really isn't that much more work, or that much more mess.  I only wash a load of diapers every few days, and when I change a diaper I just throw it right into the pail, no swishing or rinsing required.  Of course as my baby starts eating solids I do realize I will probably have to dump the poopy diapers into the toilet, but that really isn't that much more work either.

If you're wondering if cloth diapering is really worth it, here a a few reasons to give it a try:
- it saves money (disposables cost a lot)
- is better for the environment (less diapers in the landfills)
- is better for baby (no chemicals or dyes or synthetic materials on your baby's bottom)
- less leaks (I've had no leaks so far...better than with disposables)
- less diaper rash (who wouldn't rather have soft cloth next to their skin?)

Tuesday, January 25, 2011

Morning Sickness Remedies

With all three of my pregnancies I have suffered from morning sickness.  This last pregnancy it was worse than the first two, and I tried several things that I hadn't tried before.  One of which is Milk Thistle (I took 3 capsules daily).  I'm not kidding when I say that it is like a miracle.  :-)  When I started taking it, I went from lying on the couch and bed ALL DAY to being able to function again.

The neat thing that I learned is that when you get pregnant the pregnancy hormones generally overwhelm your liver, which causes nausea.  Milk Thistle is a liver cleanser or detoxifier so it helps to keep the nausea down.  Amazing, right?

A few other things that I found helpful and worth mentioning:

Peppermint Tea

Ginger Ale (especially the kind from a Natural Foods Store that has lots of real ginger in it)

Lemons (either sucking on a lemon slice plain, or drinking lemon water and lemonade)

Eating very often (an empty stomach makes the nausea much worse)

Sniffing rubbing alcohol, peppermint oil, or lavender oil

Sea Bands (worn on the wrists for motion sickness)


I hope that this info helps someone else as much as it helped me!  :-)

Friday, January 14, 2011

DIY Massage Oil


Want to make your own homemade massage oil?  It's super quick and easy, plus you can make it just the way you want it! 

Here's how I did it:

1/4 cup coconut oil (or use olive oil or another carrier/base type oil)
10 drops lavender oil (or 10 drops of any combination such as rose, sandalwood, rosemary, etc.)

You may have to get the coconut oil a little warm to mix it all together, but once the massage oil is made it stays smooth and ready to use.

Also, what I love about coconut oil is that it doesn't stain sheets or clothing.  Not to mention it is GREAT for the skin!

Have fun and be creative!  :-)

Thursday, December 16, 2010

Healthy Coffee Creamer


Liquid coffee creamer is one of my guilty indulgences.  Have you ever looked at the ingredients label?  Or read the part right on the front of the bottle that says "natural & artificial flavors"?  Ick!  Yes, that's why I said it's a guilty pleasure.

Problem is, I hate knowing that I'm drinking that stuff, but I love the way it makes my coffee taste...so much!  I've looked for healthier creamers in the grocery store, but haven't found anything that is similar to the stuff I like.

However, after a bit more searching, I did finally find a good alternative.  Enter So Delicious Coconut Milk Creamer.  :-)

I found this creamer at the Whole Foods store.  It is pricey, but it lasts a long time since I don't use much.

I also came across this post about making your own flavored coffee creamer.  I like French Vanilla the best.  :-)  I really want to try this!

Have you found a healthy alternative to artificially flavored creamer?  Please share!

Thursday, December 9, 2010

Natural Make-up Remover


I've never really used the traditional store bought make-up removers, but I just recently discovered that coconut oil makes an amazing eye make-up remover.  Who would've thought?  It sure beats pulling mascara off your eyelashes with your fingernails.  Just one more of the reasons I love coconut oil!  :-)

Tuesday, November 16, 2010

Going Natural - Coconut Oil


Coconut oil is my new thing.  If you've never used this stuff, you're missing out, and I'll tell you why.  It all started several years ago...

I grew up pretty health conscious, and I remember using Coconut Oil just a little bit, as a moisturizer, but I didn't really stick with it.  I wasn't as much of a health freak as I am now.  Then probably about two years ago I started using it more again.  I started putting it in smoothies.  I started baking with it.  I made massage oil with it.  I started using it as deodorant.  I threw away my lotion and started using it for a moisturizer (I use it instead of lotion on my babies too).  I've also used it on skin rashes and diaper rash.  Oh, and it makes a great lip balm too!

Now I'm into it even more than before, and I love it!

Coconut oil is great for boosting energy, weight loss, restoring skin health, protecting against diabetes and heart disease, is full of nutrients and antioxidants, full of good fats, etc.

A few of the things I love about coconut oil:
It makes my skin super soft and moisturized.

I don't get sun burned as easy, but instead I get a nice tan.

I feel good about what I'm putting on and in my body because it is completely natural and has no ingredients that I can't pronounce.

It protects and heals my skin.


If you want to read some of the research on coconut oil and its' many benefits, here are a couple of links you can check out:
Coconut Oil Benefits from Nutiva

Research on Coconut Oil (lots of articles here)

If you're interested in trying coconut oil, I'd suggest Nutiva.  I've been very satisfied with their coconut oil.  I usually buy it here because I can use my Swagbucks to buy it, but you can also find it in most health food stores.

Wednesday, November 10, 2010

Healing a cold naturally

As we enter cold and flu season, I begin pulling from my mental list of remedies and getting my natural medicine cabinet stocked.  We try to take a natural approach to healing as much as possible in our home, so I thought I'd share a little about the things I'm stocking up on now.

Vitamin C:
Whenever I feel a cold coming on, the first thing I start putting into my body is Vitamin C.  If you start taking a lot of it right away it can really reduce the length and severity of cold symptoms.  My favorite form of Vitamin C is currently Emergen-C.  They make little packets of powder that you mix with a little water and drink right down.  Citrus fruit is also full of Vitamin C, so we eat a lot of that in the Fall and Winter as well.

Echinacea:
Echinacea Tea is a really great immune system booster.  We like to use it even when we aren't battling colds just to help strengthen our immune defenses so we hopefully won't get sick as much.  Also, when the girls get sick I like to give them the Echinacea/Eyebright herbal formula from Herbs for Kids.

Raw Honey & Apple Cider Vinegar:
One of our favorite sore throat and cough remedies is made from mixing equal parts of Raw Honey and Apple Cider Vinegar.  We just mix up a little mug full, store it in the fridge, and take 1 tablespoon every 4 hours.  It really helps to soothe the throat and heals the body at the same time.

Elderberry Syrup:
Another great immune system booster, Elderberry Syrup is good to take even if you don't have a cold.  But if you do have a cold, you can take it more often to kick start fighting off the cold right away.  So far I have just bought this ready made, but I'm really interested in making my own this season, especially since it will be way more frugal than buying it.  We currently use Sambucol and Herbs for Kids brands.  If you want to make your own, you can check out this Elderberry Syrup how-to by Lindsey at Passionate Homemaking.

Onion & Honey Syrup:
Onions have some amazing healing power.  I think it's sort of nice to know that we can use common, inexpensive things for healing (such as onions) that are easy to find and to use.  I like this recipe for Homemade Cough & Cold Syrup from Stephanie at Keeper of the Home.

This is certainly not an exhaustive list of natural cold remedies, but it's a good place to start.  I hope you find something useful here!  :-)

*In the way of a disclaimer let me just say that I'm not a doctor or anything like that.  I'm just sharing what works for us.

Wednesday, June 2, 2010

A Garden Tale - Part 1

Ok, so I have taken numerous photos of our gardening process this year with the intention of showing them to you all, complete with regular updates, but I have been really slack (or really busy) and have totally neglected to do so.

 We used an assortment of items we had around the house.
Egg cartons are not a good idea.

So here's some "back story" right now, complete with pictures!  This is our third year gardening and this year we decided to plant almost everything from seed, which we haven't done much of in past years.  In March we planted most of our seeds and kept them indoors near a window.  We made mini greenhouses out of plastic bags to keep in moisture and humidity.  It all worked out pretty well.

 Most of the first batch of seeds we planted.

Our first year we mostly grew everything in pots.  Last year we grew our garden in a small spot near the house with a few plants in pots on our back patio.  This year, we decided that we really wanted to go much bigger and better.  So we tilled up a spot about 20' x 30', bought some fencing (since we have deer, rabbits, and squirrels in our yard often), and started getting it all set up.

Tiny sprouts.

More tiny sprouts.

Another new thing for us this year is growing in raised beds.  For these, we really couldn't afford to build boxes so we just piled up the dirt until we had raised beds.  Raised beds help to maintain moisture and reduce weeds.

Seedlings.

Next we mulched.  Mulching around garden plants is another way to keep the moisture in and the weeds out.  We have a big compost pile this year, too, but it's not quite ready to go in the garden so we've just been raking up the under layer of leaves and using that.  It has helped out tremendously.

Squash & Zucchini seedlings.

As I mentioned before we have already started harvesting some vegetables and herbs.

Zucchini.

Watch for my next gardening post in which I'll share about what we're growing and show you some more pictures.  :-)

 Squash.

Wednesday, May 26, 2010

Our First Garden Harvest


We harvested our first vegetables (not including all the herbs we've been eating already) from our garden this week!  I'm super excited to see all our hard work paying off.  Already our garden looks a ton better and bigger and healthier than last year.  So far we have picked two zucchini, two cucumbers, a few leaves of lettuce, and some cherries.  The cherries aren't technically in the garden, but we have been picking and eating them this week.  :-)

In the next few days I expect to be picking a few squash, more zucchini, and more cucumbers.  There's really nothing like growing and eating your own pesticide free produce that is real and free!  I hope that our garden saves us a lot of money this year.

I know I've been really bad about posting up our garden progress this year, but I promise that I'm still going to give you the story.  It's quite interesting really.  Be looking for another gardening post this week!

Monday, April 5, 2010

EcoSMART Natural Bug Killer Products - Review & Giveaway


If there is one thing that really bugs me, I would have to say that it's bugs.  I don't like them at all!  Funny how those of us who dislike bugs the most seem to also attract them the most.  I think the thing I dread most in the Summertime is the mosquitoes.  I am always on the hunt for a good natural bug spray.  It's important to me to have a natural bug spray that doesn't have any harmful chemicals and is safe to use on children.

EcoSMART is an organic pesticide company that sells a variety of pest control products which are all non-toxic and safe around children and pets.  Their mission is to "create the world's safest, most effective pesticides based on natural ingredients".  All of the EcoSMART product lines are based on essential oils, the natural defense that plants and trees use for their own protection against insects and pathogens.

I recieved a Safe Home Value Bundle from EcoSMART which included a Home Pest Control Spray (can be used indoor or outdoor for most bugs and insects), Flying Insect Killer, Ant & Roach Killer, and Insect Repellent.

Although I haven't had a chance to use it yet this year, I'm super excited about the Insect Repellent, since I have issues with mosquitoes.  I did get the chance to try out the Flying Insect Killer on the many wasps that have all of a sudden started hanging out all around the outside of our house.  I do wish that it sprayed in a stronger stream, but It's still better than using something that has all kinds of chemicals in it.

I'm also really happy to have the home pest control spray, which kills and repels many common bugs and insects, including roaches, which seem to be our most common problem.  I had a good opportunity to use it this morning, actually...I killed a beetle that was on my kitchen counter!

So now to the really fun part.  The best part about all of this is, you get a chance to win a Safe Home Value Bundle!!  The giveaway starts today, and will end April 19, 2010 at 11:00pm (EST).  This giveaway is open to U.S. residents except Alaska and Hawaii.  To enter, leave a comment on this post telling why you want or need this value bundle, and also leave me your email address so that I can contact you if you win.  Thanks!

*I received a bundle to review.  This in no way influences my opinion or review of these products.

Friday, March 26, 2010

Pure-Heal Gel (Natural Remedies Online) - A Review

I'm really into natural health and healing.  If at all possible I prefer to avoid unnecessary medicines and the yucky side affects that often accompany them.  Not to say that there is never a need for them, but just that when possible, I want to be cautious of what I put into my body and the bodies of my husband and kids.  We use a lot of herbal remedies because I find them to be safe, natural, and effective.

I've just had the opportunity to try out a product from Natural Remedies Online, a new company that sells natural general health remedies.  I chose to try out the Pure-Heal Gel, and while I haven't had much opportunity to use it yet, I can say that I am really pleased with the ingredients.  The Pure-Heal Gel contains five ingredients, all of which I can pronounce and recognize.  That's a big deal considering I like to know exactly what I'm putting on my skin.  I also appreciate the fact that you can see the ingredients on the product page before you order.

From the Pure-Heal Gel description on the Natural Remedies Online website, "Pure-Heal Gel is a 100% safe and natural topical herbal gel that helps to support and soothe the skin after minor mishaps and everyday insect bites."  Personally, I can't wait to try this on mosquito bites...I tend to get a lot of them in the Summertime.  I also have my eye on a couple other products like the diaper cream for babies and some of the other skin products.

Be sure to check out the nice variety of products at Natural Remedies Online.